Custom Search

CLR Stored Procedure


SQL SERVER – Introduction to CLR – Simple Example of CLR Stored Procedure

CLR is abbreviation of Common Language Runtime. In SQL Server 2005 and later version of it database objects can be created which are created in CLR. Stored Procedures, Functions, Triggers can be coded in CLR. CLR is faster than T-SQL in many cases. CLR is mainly used to accomplish task which are not possible by T-SQL or can use lots of resources. CLR can be usually implemented where there is intense string operation, thread management or iteration methods which can be complicated for T-SQL. Implementing CLR provides more security to Extended Stored Procedure.
Let us create one very simple CLR where we will print current system datetime.
1) Open Microsoft Visual Studio >> Click New Project >> Select Visual C# >> Database >> SQL Server Project
2) Either choose from existing database connection as reference or click on Add New Reference. In my example I have selected Add New Reference.
3) If you have selected existing reference skip to next step or add database reference as displayed in image.
4) Once database reference is added following project will be displayed in Solution Explorer. Right click on Solution Explorer >> Click on Add >> Stored Procedure.
5) Add new stored procedure template from following screen.
6) Once template added it will look like following image.
7) Now where it suggest to //Put your code here. Replace it with code displayed in the image. Once the code is complete do following two steps.
a) Click on menu bar >> Build >> Build ProjectName
b) Click on menu bar >> Build >> Deploy ProjectName
Building and Deploying project should give successful message.

using System;
using System.Data;
using System.Data.SqlClient;
using System.Data.SqlTypes;
using Microsoft.SqlServer.Server;
public partial class StoredProcedures
{
[Microsoft.SqlServer.Server.SqlProcedure]
public static void CLRSPTest()
{
SqlPipe sp;
sp = SqlContext.Pipe;
String strCurrentTime = “Current System DateTime is: “
+ System.DateTime.Now.ToString();
sp.Send(strCurrentTime);
}
};
8) Now open SQL Server Management Studio and run following script in Query Editor. It should return current system datetime. Running it again the time will change.
USE AdventureWorks
GO
EXEC dbo.CLRSPTest
GO

Read more...

WCF Architecture


The following figure illustrates the major components of WCF.


Figure 1: WCF Architecture

Contracts

Contracts layer are next to that of Application layer. Developer will directly use this contract to develop the service. We are also going to do the same now. Let us see briefly what these contracts will do for us and we will also know that WCF is working on message system.

Service contracts

- Describe about the operation that service can provide. Example, Service provided to know the temperature of the city based on the zip code, this service we call as Service contract. It will be created using Service and Operational Contract attribute.

Data contract

- It describes the custom data type which is exposed to the client. This defines the data types, are passed to and from service. Data types like int, string are identified by the client because it is already mention in XML schema definition language document, but custom created class or datatype cannot be identified by the client e.g. Employee data type. By using DataContract we can make client aware that we are using Employee data type for returning or passing parameter to the method.

Message Contract

- Default SOAP message format is provided by the WCF runtime for communication between Client and service. If it is not meeting your requirements then we can create our own message format. This can be achieved by using Message Contract attribute.

Policies and Binding

- Specify conditions required to communicate with a service e.g security requirement to communicate with service, protocol and encoding used for binding.

Service Runtime

- It contains the behaviors that occur during runtime of service.
  • Throttling Behavior- Controls how many messages are processed.
  • Error Behavior - Specifies what occurs, when internal error occurs on the service.
  • Metadata Behavior - Tells how and whether metadata is available to outside world.
  • Instance Behavior - Specifies how many instance of the service has to be created while running.
  • Transaction Behavior - Enables the rollback of transacted operations if a failure occurs.
  • Dispatch Behavior - Controls how a message is processed by the WCF Infrastructure.

Messaging

- Messaging layer is composed of channels. A channel is a component that processes a message in some way, for example, by authenticating a message. A set of channels is also known as a channel stack. Channels are the core abstraction for sending message to and receiving message from an Endpoint. Broadly we can categories channels as
  • Transport Channels
Handles sending and receiving message from network. Protocols like HTTP, TCP, name pipes and MSMQ.
  • Protocol Channels
Implements SOAP based protocol by processing and possibly modifying message. E.g. WS-Security and WS-Reliability.

Activation and Hosting

- Services can be hosted or executed, so that it will be available to everyone accessing from the client. WCF service can be hosted by following mechanism
  • IIS
Internet information Service provides number of advantages if a Service uses Http as protocol. It does not require Host code to activate the service, it automatically activates service code.
  • Windows Activation Service
(WAS) is the new process activation mechanism that ships with IIS 7.0. In addition to HTTP based communication, WCF can also use WAS to provide message-based activation over other protocols, such as TCP and named pipes.
  • Self-Hosting
WCF service can be self hosted as console application, Win Forms or WPF application with graphical UI.
  • Windows Service
WCF can also be hosted as a Windows Service, so that it is under control of the Service Control Manager (SCM).

Read more...

FileStream Open File [C#]

This example shows how to open files for reading or writing, how to load and save files using FileStream in C#. To open file create instance of FileStream class with FileMode and FileAccess enumerations as parameters.

FileStream typical use
This is typical code when opening file using FileStream. It's important to always close the stream. If you don't close the stream it can take a minute to be file again accessible (it will wait to garbage collector to free the FileStream instance and close the file).

[C#]
using System.IO;

FileStream fileStream = new FileStream(@"c:\file.txt", FileMode.Open);
try
{
// read from file or write to file
}
finally
{
fileStream.Close();
}

Open file examples
Following examples show the most common cases how to open a file for reading or writing or how to create a file.

[C#] Open existing file for read and write.
FileStream fileStream = new FileStream(@"c:\file.txt", FileMode.Open);


[C#] Open existing file for reading.
FileStream fileStream = new FileStream(@"c:\file.txt", FileMode.Open, FileAccess.Read);


[C#] Open existing file for writing.
FileStream fileStream = new FileStream(@"c:\file.txt", FileMode.Open, FileAccess.Write);


[C#] Open file for writing (with seek to end), if the file doesn't exist create it.
FileStream fileStream = new FileStream(@"c:\file.txt", FileMode.Append);


[C#] Create new file and open it for read and write, if the file exists overwrite it.
FileStream fileStream = new FileStream(@"c:\file.txt", FileMode.Create);


[C#] Create new file and open it for read and write, if the file exists throw exception.
FileStream fileStream = new FileStream(@"c:\file.txt", FileMode.CreateNew);

Read more...

SQL - Join

SQL JOIN joins together two tables on a matching table column, ultimately forming one single temporary table. The key word here is temporary. The tables themselves remain intact, and running a JOIN query does not in any way change the data or table structure. JOIN is another way to select specific data from two or more relational tables.


In order to perform a JOIN query, we need a few pieces of information: the name of the table and table column we want to join on and a condition to meet for the JOIN to happen. This should sound a little confusing as there is much going on in a JOIN query, so let's take a look at an example:


SQL Join Query Code:

USE mydatabase; SELECT * FROM orders JOIN inventory ON orders.product = inventory.product;


SQL Join Results:

idcustomerday_of_orderproductquantityidproductquantityprice
1Tizag2008-08-01 00:00:00.000Hanging Files115Hanging Files3314.99
2Tizag2008-08-01 00:00:00.000Stapler34Stapler37.99
3A+Maintenance2008-08-16 00:00:00.000Hanging Files145Hanging Files3314.99
4Gerald Garner2008-08-15 00:00:00.00019" LCD Screen5119" LCD Screen25179.99
5Tizag2008-07-25 00:00:00.00019" LCD Screen5119" LCD Screen25179.99
6Tizag2008-07-25 00:00:00.000HP Printer42HP Printer989.99

The line beginning with JOIN (Line 4) is where we tell SQL which table we would like to join. The next line (Line 5) is a different story. Here is where we have specified the condition to JOIN ON. In this case, both tables have identical product columns which makes them an ideal target for a join. Basically we are temporarily merging the tables connecting them where they match, the product column.


This type of join matches values from one table column with a corresponding value in another table and uses that match to merge the tables together. In our make-believe store world, this let's us join the inventory table with the orders table to show us all the items we currently have in stock for our customers and also the price of each item.


Let's rework this query a bit and strip away a few of the table columns to make our results easier to read and understand. We will replace the (*) parameter with a list containing only the table columns we are interested in viewing.


SQL Join:

USE mydatabase; SELECT orders.customer, orders.day_of_order, orders.product, orders.quantity as number_ordered, inventory.quantity as number_instock, inventory.price FROM orders JOIN inventory ON orders.product = inventory.product


SQL Results:

customerday_of_orderproductnumber_orderednumber_instockprice
Tizag2008-08-01 00:00:00.000Hanging Files113314.99
Tizag2008-08-01 00:00:00.000Stapler337.99
A+Maintenance2008-08-16 00:00:00.000Hanging Files143314.99
Gerald Garner2008-08-15 00:00:00.00019" LCD Screen525179.99
Tizag2008-07-25 00:00:00.00019" LCD Screen525179.99
Tizag2008-07-25 00:00:00.000HP Printer4989.99

Since we have one column in each table named the same thing (quantity), we used AS to modify how these columns would be named when our results were returned. These results should be more satisfying and easier to read now that we have removed some of the unnecessary columns.


SQL - Right Join


RIGHT JOIN is another method of JOIN we can use to join together tables, but its behavior is slightly different. We still need to join the tables together based on a conditional statement. The difference is that instead of returning ONLY rows where a join occurs, SQL will list EVERY row that exists on the right side, (The JOINED table).


SQL - Right Join:

USE mydatabase; SELECT * FROM orders RIGHT JOIN inventory ON orders.product = inventory.product


SQL Results:

idcustomerday_of_orderproductquantityidproductquantityprice
4Gerald Garner2008-08-15 00:00:00.00019" LCD Screen5119" LCD Screen25179.99
5Tizag2008-07-25 00:00:00.00019" LCD Screen5119" LCD Screen25179.99
6Tizag2008-07-25 00:00:00.000HP Printer42HP Printer989.99
NULLNULLNULLNULLNULL3Pen780.99
2Tizag2008-08-01 00:00:00.000Stapler34Stapler37.99
1Tizag2008-08-01 00:00:00.000Hanging Files115Hanging Files3314.99
3A+Maintenance2008-08-16 00:00:00.000Hanging Files145Hanging Files3314.99
NULLNULLNULLNULLNULL6Laptop16499.99

You should see a new row at the bottom of the results box with a bunch of NULL values. This is a result of the RIGHT JOIN and is the intended result from running the query. We end up with an extra row because inside of the inventory table, the Laptop item was not joined with a product from the orders table. This just means that we have not sold a laptop as of yet and it shouldn't be much a surprise since we already know from querying the orders table in previous lessons that there have been no laptop orders so far.


By specifying RIGHT JOIN, we have told SQL to join together the tables even if no matches are found in the conditional statement. All records that exist in the table on the right side of the conditional statement (ON orders.product = inventory.product) will be returned and NULL values will be placed on the left if no matches are found.


SQL - Left Join


SQL LEFT JOIN works exactly the same way as RIGHT JOIN except that they are opposites. NULL values will appear on the right instead of the left and all rows from the table on the left hand side of the conditional will be returned.


Unfortunately, we will not be able to show a very intuitive example of a LEFT JOIN because of how our tables are structured. The orders table should always have a matching inventory item and if not, that means we are in big trouble as we could be selling items we do not carry in inventory. For good measure, here's what a LEFT JOIN would look like:


SQL Left Join:

USE mydatabase; SELECT * FROM orders LEFT JOIN inventory ON orders.product = inventory.product


SQL JOIN is intended to bring together data from two tables to form a single larger table, and often, it will paint a more detailed picture of what the data represents. By merging these two data sets, we were able to peer into our database and ensure that each item ordered so far is in stock and ready to be shipped to our customers.

Read more...

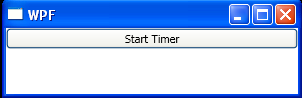
Update the UI Asynchronously on a Timer

                                     Update the UI Asynchronously on a Timer

<Window x:Class="WpfApplication1.Window1"
    xmlns="http://schemas.microsoft.com/winfx/2006/xaml/presentation"
    xmlns:x="http://schemas.microsoft.com/winfx/2006/xaml"
    Title="WPF" Height="100" Width="300">
    <StackPanel>
        <Button x:Name="button" Click="Button_Click">Start Timer</Button>
        <TextBlock x:Name="txtStatus">
        </TextBlock>
    </StackPanel>
</Window>

//File:Window.xaml.cs

using System;
using System.Windows;
using System.Windows.Threading;

namespace WpfApplication1
{
    public partial class Window1 : Window
    {
        private DispatcherTimer timer;
         
        public Window1()
        {
            InitializeComponent();
        }

        private void Button_Click(object sender, RoutedEventArgs e)
        {
            if(timer == null || !timer.IsEnabled)
            {
                timer = new DispatcherTimer();

                timer.Interval = TimeSpan.FromMilliseconds(1000);
                timer.Tick += new EventHandler(timer_Tick);

                timer.Start();
                button.Content = "Stop Timer";
            }
            else
            {
                timer.Stop();
                button.Content = "Start Timer";
            }
        }

        private void timer_Tick(object sender, EventArgs e)
        {
            txtStatus.Text = DateTime.Now.Second.ToString();
        }
    }
}

Read more...

Back to TOP